Page layout
Arranging pictures and text on a page can sometimes be a little challenging!
Firstly, lets look at the tools and what they do:
 Left justify
Text justified on the left uses the left hand margin as a guide and the right is "ragged".
 Right justify
Text justified on the right uses the right hand margin as a guide and the left is "ragged".
 Centre text
Text is centred in the middle of the page.
 Break
Break
If you are writing around an image click on the break icon at the end of a paragraph to start the next paragraph under the image.
Demonstrating placing an image
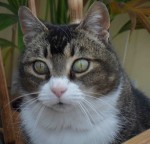
 I uploaded this image of Tigger, resized it, saved it, and then I placed my cursor next to the image and typed this text and set the text to left justify. As you can see it runs untidely round the edge of the picture. The next step will tidy it.
 To make the text flow neatly around the edge of the picture I clicked on the image (to select it) and then clicked on left justify. The text and image rearranged themselves neatly like this. You could of course click on right justify to place the image to the right, see below.
Demonstrating the break key
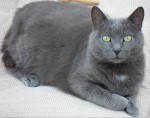
 If you are able to vary the width of your screen (by dragging the bottom right hand corner of your browser window to the left) you will see the spacing between the picture of Tigger and associated text above vary untidily in relation to this paragraph. However the spacing between this picture of Mitzie and the one below remains consistant.
 This is because I used the break tool
  after the word "consistant."
By keeping spacing controlled your page will adapt neatly to whatever window size your reader is using, however if your website uses a fixed width template, resizing the screen won't show the effect but you should still use the break tool.


