Adding pictures
A picture is a great way to show information and break up long prose.
Uploading a picture
Go to the webpage the picture is to be added to.
On the control panel use the button Browse or Choose (the word varies between browsers), search through your files and click on the image to select it, now click on open.
Next place your cursor on the page where the image is to be placed, now click on the Image icon![]() this will place the image on the page and a box will appear:
this will place the image on the page and a box will appear:

Add a short piece of descriptive text here, this information is used by screen readers for people with sight limitations and search engines.

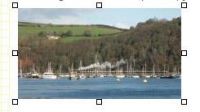
If you hover over the picture of the river scene above, you will see the hover text in action.
Now save the page. You will need to save the page after each picture is added.
Enlarging and reducing the size of an image
To change the size of a picture, first put your cursor in the middle of the picture and click on it to select it:

The Control Panel will change slightly and you will see:

Change either the width or the height and then click on Apply, the picture will automatically resize itself based on that one new dimension.
You can also change the hover text on the image by clicking in the Title field and then clicking on Apply.
Don't forget to Save your changes.
Moving an image on a page
Select the image by clicking on it:

Now place your cursor in the middle of the picture and hold down the the left click and drag the image, the actual image will remain but you will see that your cursor has turned into a vertical line. When the vertical line is situated where you want to place the picture let go of the click and the image will jump to the new position on the left hand margin.
Left, right or centre
To place the image against the right hand margin, select the picture and then use the alignment icons to place it left, right or centre on the page:
![]()
It is worth playing around with these in conjucntion with some text so that you get the feel of it.
To float this image in the middle of this sentence ![]() I made sure that none of the alignments on the image were selected and then I dragged the image to the exact place in the sentence and then I carried on typing.
I made sure that none of the alignments on the image were selected and then I dragged the image to the exact place in the sentence and then I carried on typing.
![]() To float it to the left of this paragraph I dragged it so that it was placed in front of "To float..." and then I clicked on the align left icon. It is worth saving the image before you move it round the page and then again once you are happy with the new placement.
To float it to the left of this paragraph I dragged it so that it was placed in front of "To float..." and then I clicked on the align left icon. It is worth saving the image before you move it round the page and then again once you are happy with the new placement.
![]() To float it to the right of this paragraph I dragged it so that it was initially placed in front of "To float..." and then I clicked on the align right icon and it moved to the far right.
To float it to the right of this paragraph I dragged it so that it was initially placed in front of "To float..." and then I clicked on the align right icon and it moved to the far right.
Try the break icon to move text around an image, see how.
Take a little time and play.
Two of the most common problems when adding a picture
Is the picture a jpg?
You can use images straight from your camera. If you edit an image remember to save it as a jpg.
Does the name include a punctuation mark?
The file name must contain only alphabetic or numeric characters - beware of descriptions such as:
president's award.jpg instead use presidents award.jpg.
[Back]


